


Build your first real game with generated 3D models in Unreal Engine. No code.
Learn how to generate 3D models complete with rigged up skeleton and walking/dying etc animations. Then get them walking around your very own world complete with custom backing track.
Forwarded this email? Subscribe here for more ✨
Welcome to the 15th edition of the 100 GenAI MVPs newsletter, a journey all about shipping 100 happy and helpful GenAI solutions, and how to build them! 🚀👩💻✨ Together, we built a Robot Panda you can chat with (🏆 award winner), a video clip extractor (Men In Black edition), and many more (this is project 27)!
Great for anyone curious about the possibilities of AI, perfect for technical AI builders 🤖🛠️🧰
Hellooo AI Alchemists! 🤖🧪✨
I MADE A GAME. A REAL GAME. Eeep! And now you can too.
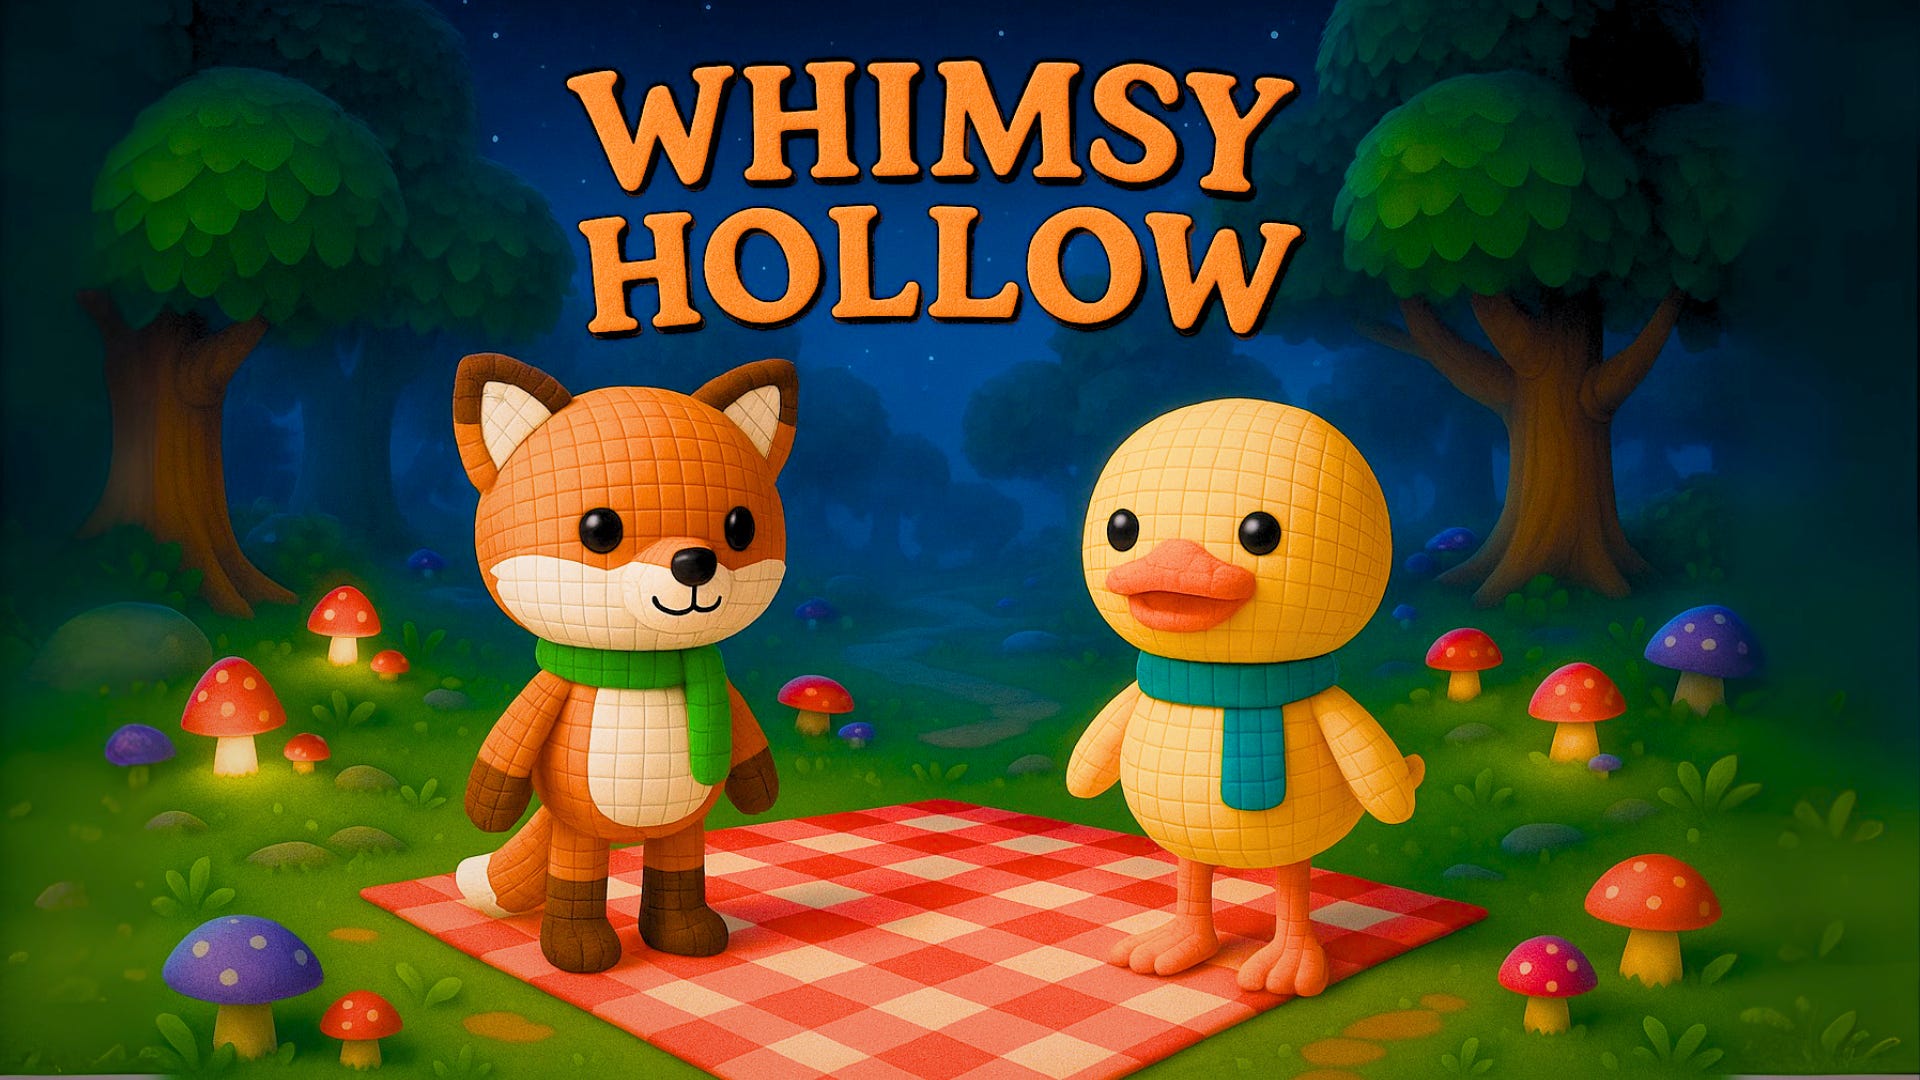
Introducing Whimsy Hollow, a place where you can explore a tiny forest patch that's suspiciously floaty. Wander into Whimsy Hollow, and you'll fall in love. Or just fall 🤣 🦊🐥🌳🪵🍄💐
Every single character and item you see here (including the floor tiles), were generated with AI tools. Even the music track 🤯
The game itself was made without a single line of code, using Unreal Engine's no-code drag and drop interface. (Doesn't mean it was easy tho, game dev is hard enough that I am very, very proud of this demo video).
To save you at least a month's worth of time trying to figure out how to do all of this yourself, I wrote a deep dive to teach you how to:
1. Generate 2D base images for your character, using ChatGPT.
2. Generate 3D models that look exactly the same as your reference image, using 3D AI Studio.
3. Rig up your models so they have a skeleton and animations, using Mixamo for humanoid characters and Anything World for characters with tails/wings/four legs etc.
4. Create a simple world in Unreal Engine and hook up the idle and walking animations, so you can walk around as your characters.
5. Generate a backing track with Suno (pure instrumentals like the chiptune used here, or songs with vocals).
Are you ready!??
Let’s get building! 🤿
— Becca 💖
If you’d like to see more frequent updates, connect with me on LinkedIn 🥰

Part 1: Generate 3D models that can dance and die
You can create any character in the world that you want, and turn it into a 3D model that you can drop into your very own game world.
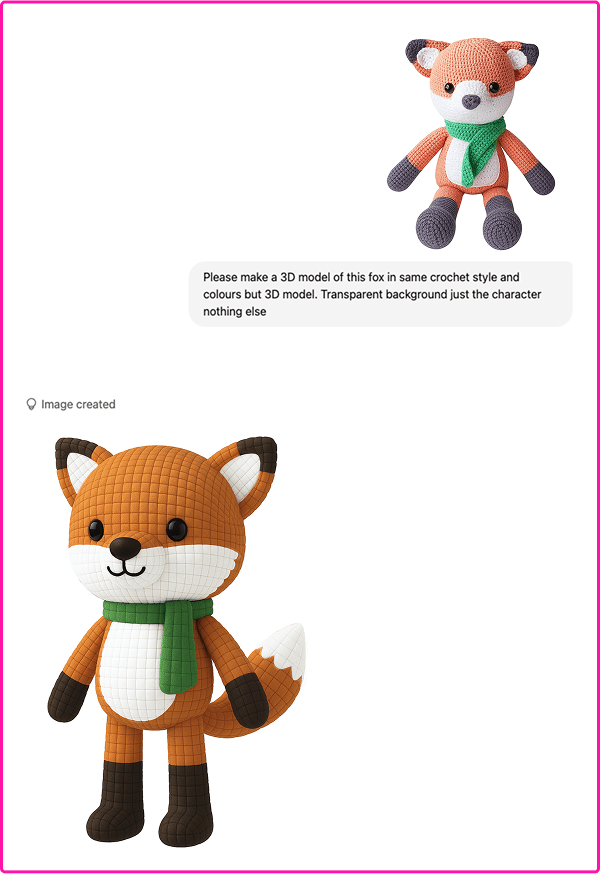
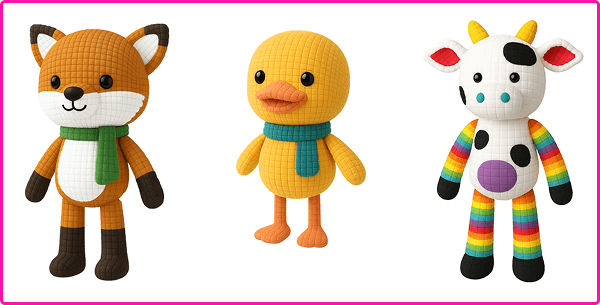
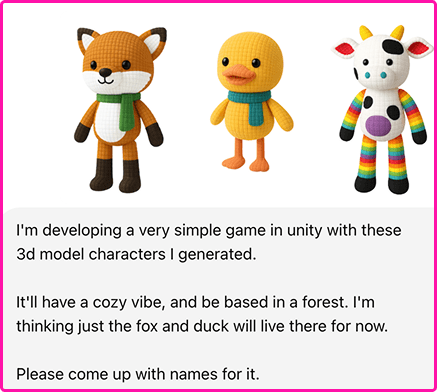
In this case, I turned a few of the crochet toys I designed years ago, into 2D image references that I used to generate some pretty amazing 3D models that can walk, talk, jump and dramatically die. 🦊💀🤯
1.1. Generate character with ChatGPT
It took me about a weeks worth of evenings to figure this 3D model generation workflow out. But it should only take you an hour following this (even with experimentation baked in)💖
Ask ChatGPT to generate a 3D model character image for you in 3/4 view with arms slightly out to the sides and a transparent background. Ask it to remove drop shadows too. I gave it a reference image of my crochet toys.
^ If you don't do arms out to sides, you can't rig it properly as all joints (knees, elbows, wrists, ankles) need to be visible. If you don't remove the default drop-shadow it screws up the 3D model generation (adds weird sleds below feet).
Once you have a character style you’re happy with, use it as a reference image so ChatGPT can create another one in the same style. Like this:
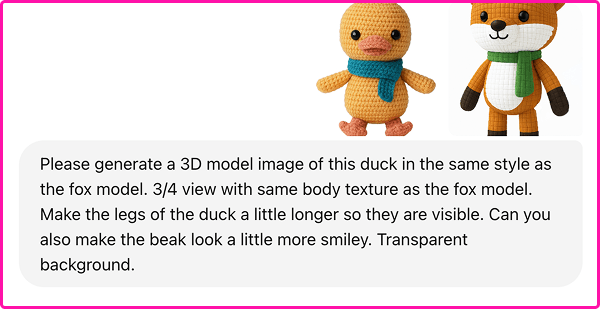
Here are the models I generated based on three of my crochet toy designs:
1.2. Generate character with ChatGPT
I originally went with Meshy because it combines model generation with rigging. Don't do that. I spent two days generating the most cursed models.
Instead, head to 3daistudio.com, and use the image to model option. Just upload the 3D model image you made with ChatGPT as reference and click "generate". It's as easy as that to produce the model you see in the video.
You get best results when the colours are solid and have high contrast (whites are whites rather than off-yellow).
Download your model (with correct settings)
On 3D AI Studio, download your model as an .obj file with textures downloaded separately as a zip file. See the screenshot below for all of the settings you need:
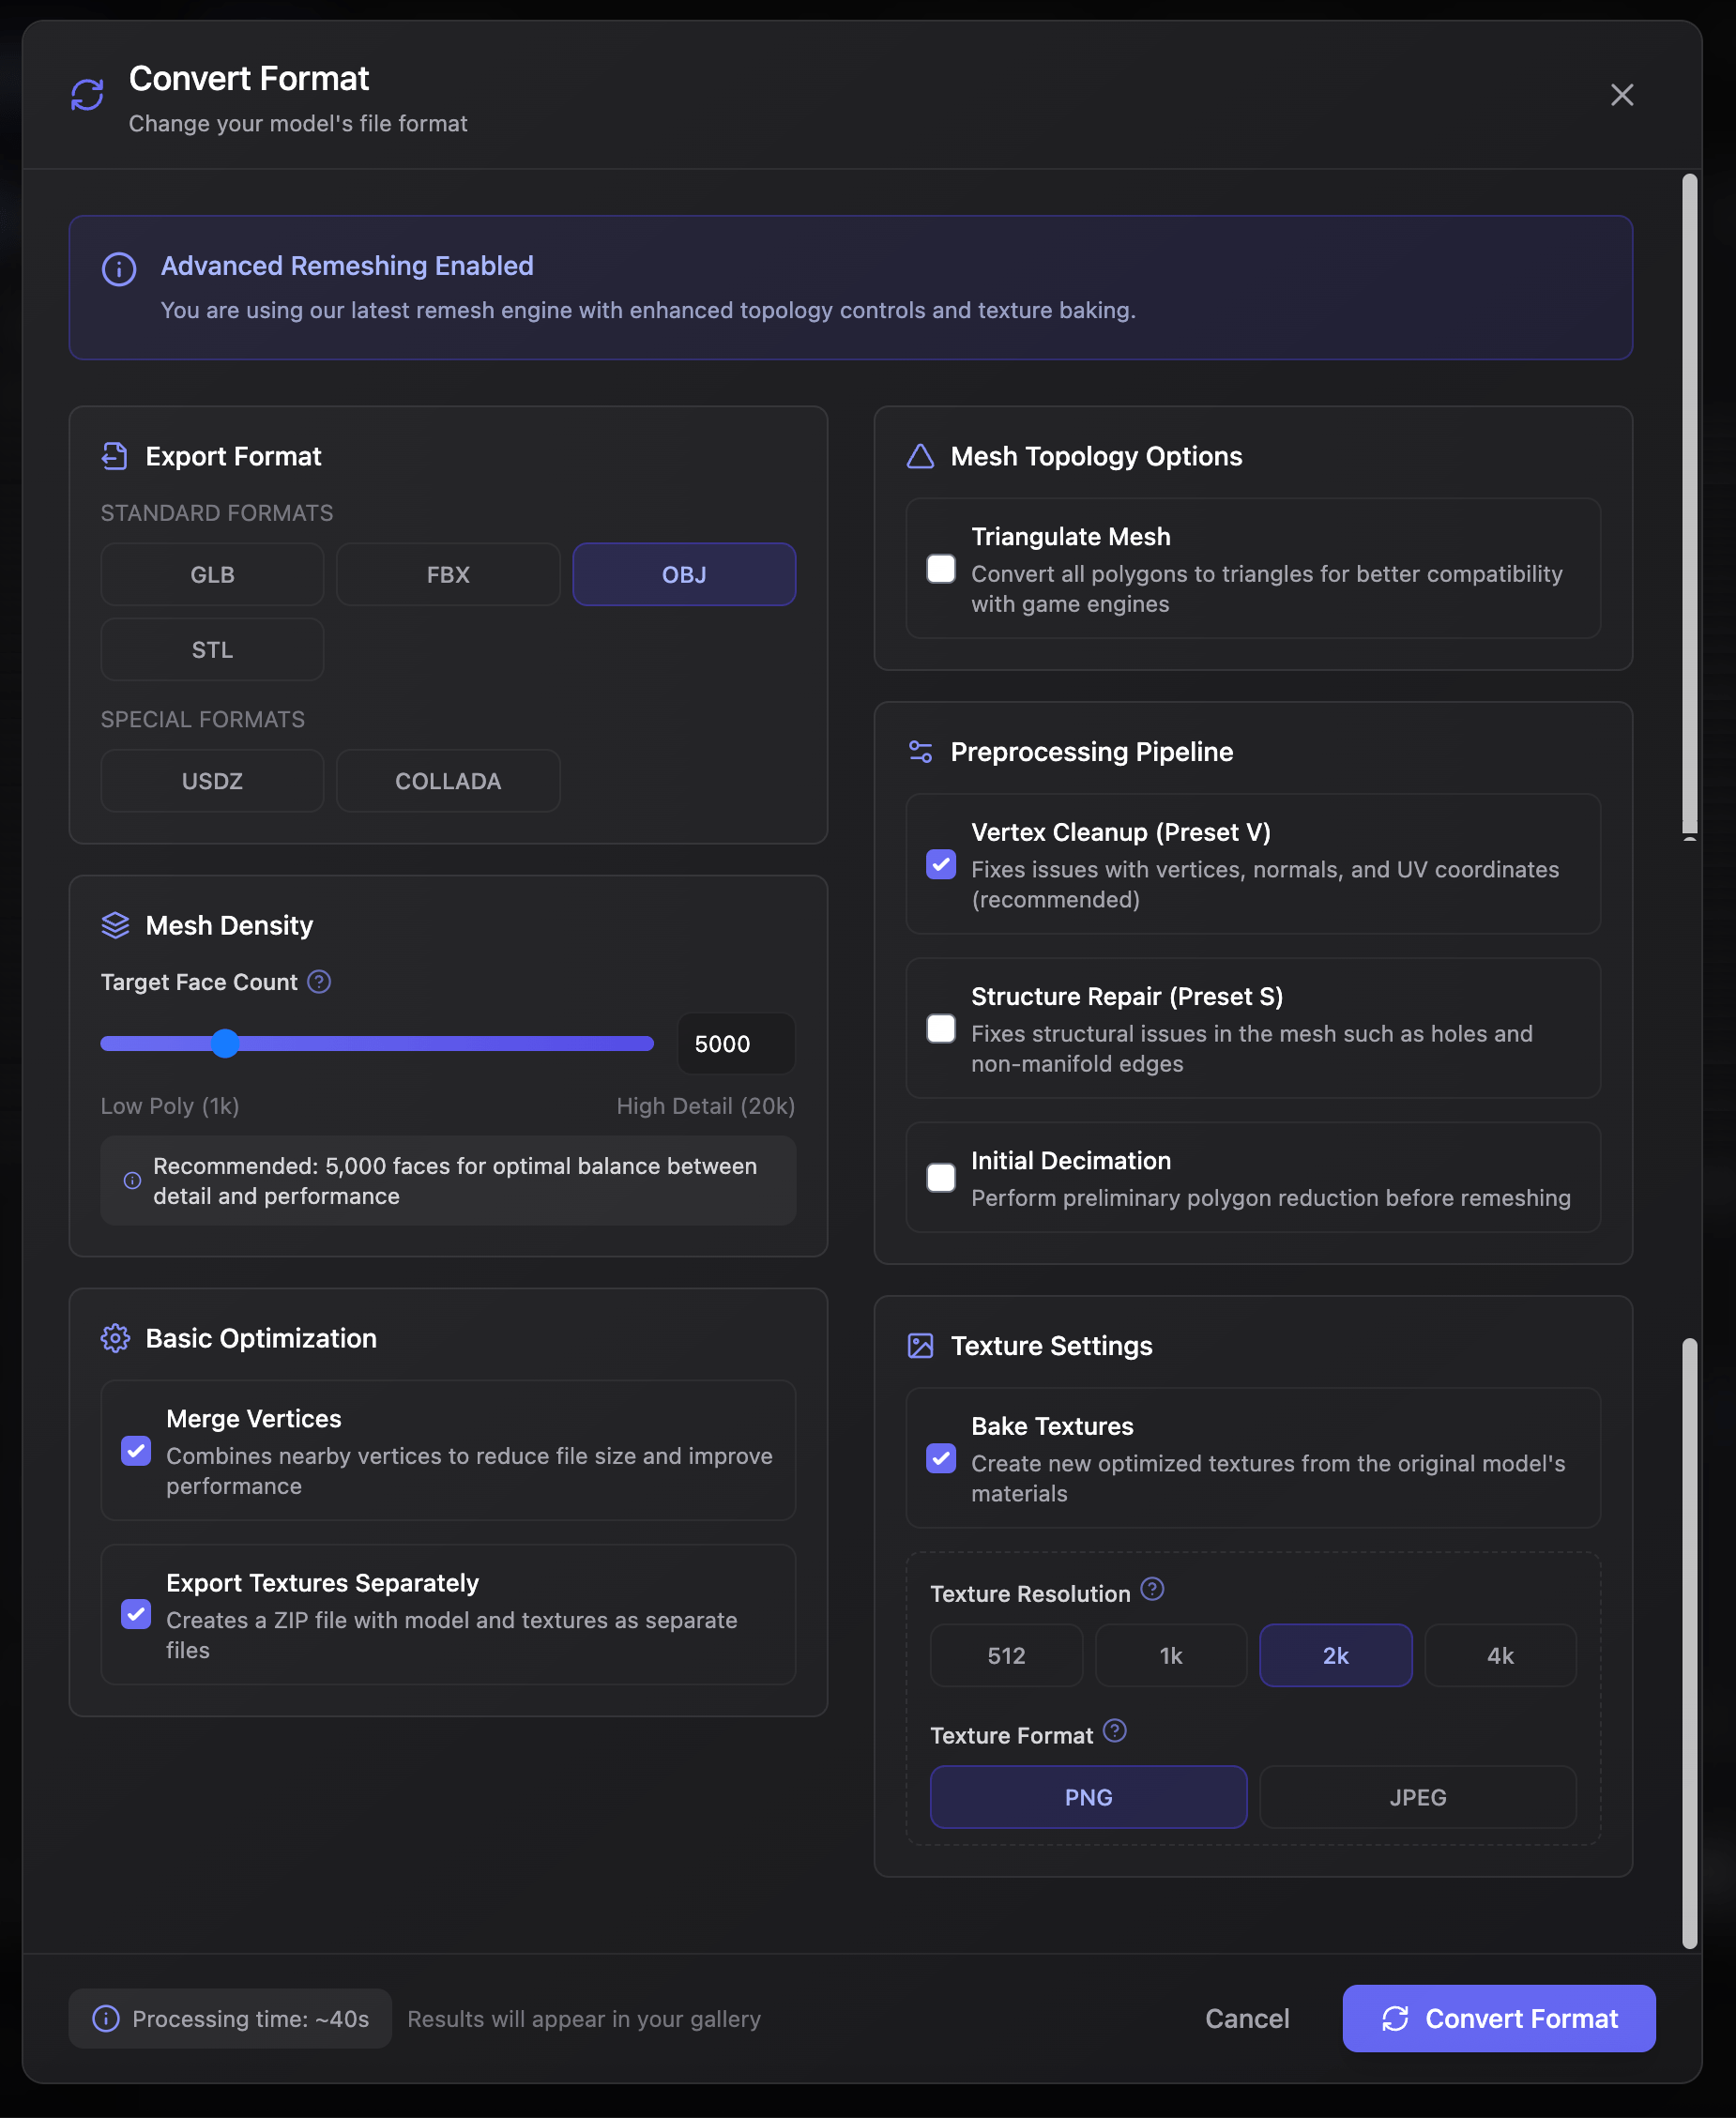
3D AI Studio doesn't let you download the model with embedded textures, so you need to embed the textures yourself (next step) before you can upload your model to a rigging platform. Otherwise, you'll only be able to animate the plain grey base model with no colour.
1.3. Export model with textures from Blender
Download Blender (a 3D modelling software), and import your .obj file. Make sure the textures are in the same folder when importing so Blender can pick it up.
Click on your grey model, then click the "shading" tab. If the textures were in same folder your model will now come to life.
With model selected: file > export > “.fbx”. Check "Selected Objects". Then click "Path Mode" and choose "Copy". Click the "Embed textures" button next to it to turn it on. Then click “Export FBX”.
Here is a video for how to export your model as .fbx file with embedded textures:
1.4. Rig up and animate with Anything World
If you generated a humanoid character with no tail or wings, use Mixamo instead. They have a set of very polished animations and handle rigging really well. But it won't work for characters like this fox with a tail.
Otherwise, use Anything World, which is still great. Here’s a video of uploading the fox model (I chose humanoid rather than a quadruped given that my fox is standing on two feet):
Part 2: Create a game in Unreal Engine
Now that we have some amazing 3D characters, it would be a shame not to learn how to develop a full-blown game to use them in.
Yup.
If you don’t know what game you want to use your characters in, lean on AI for some ideas to help you get closer to the vibes you like.
2.1. Come up with a game concept
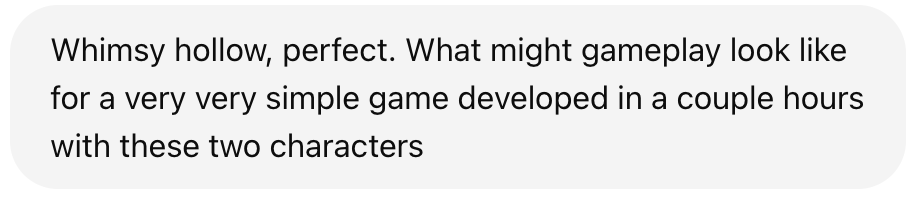
Brainstorm name ideas
I started by brainstorming game names. I gave ChatGPT some pics of the 3D models of my characters, then wrote this prompt:
I really, really loved the name Whimsy Hollow. It’s just perfect.
Brainstorm game ideas
Once you have a name you like (or you could stick with Untitled, like Untitled Goose Game). You can also ask ChatGPT to help you come up with some gameplay ideas.
I narrowed the scope to base ideas on a 2-hour window for developing the game. I expected it’d take weeks longer to make one, but it was a good trick for getting ChatGPT to come up with game ideas that require less dynamics like levels and entire story arcs.
The third idea was my favourite, a cozy picnic scene where the characters can collect snacks and then have a picnic at the end of it.

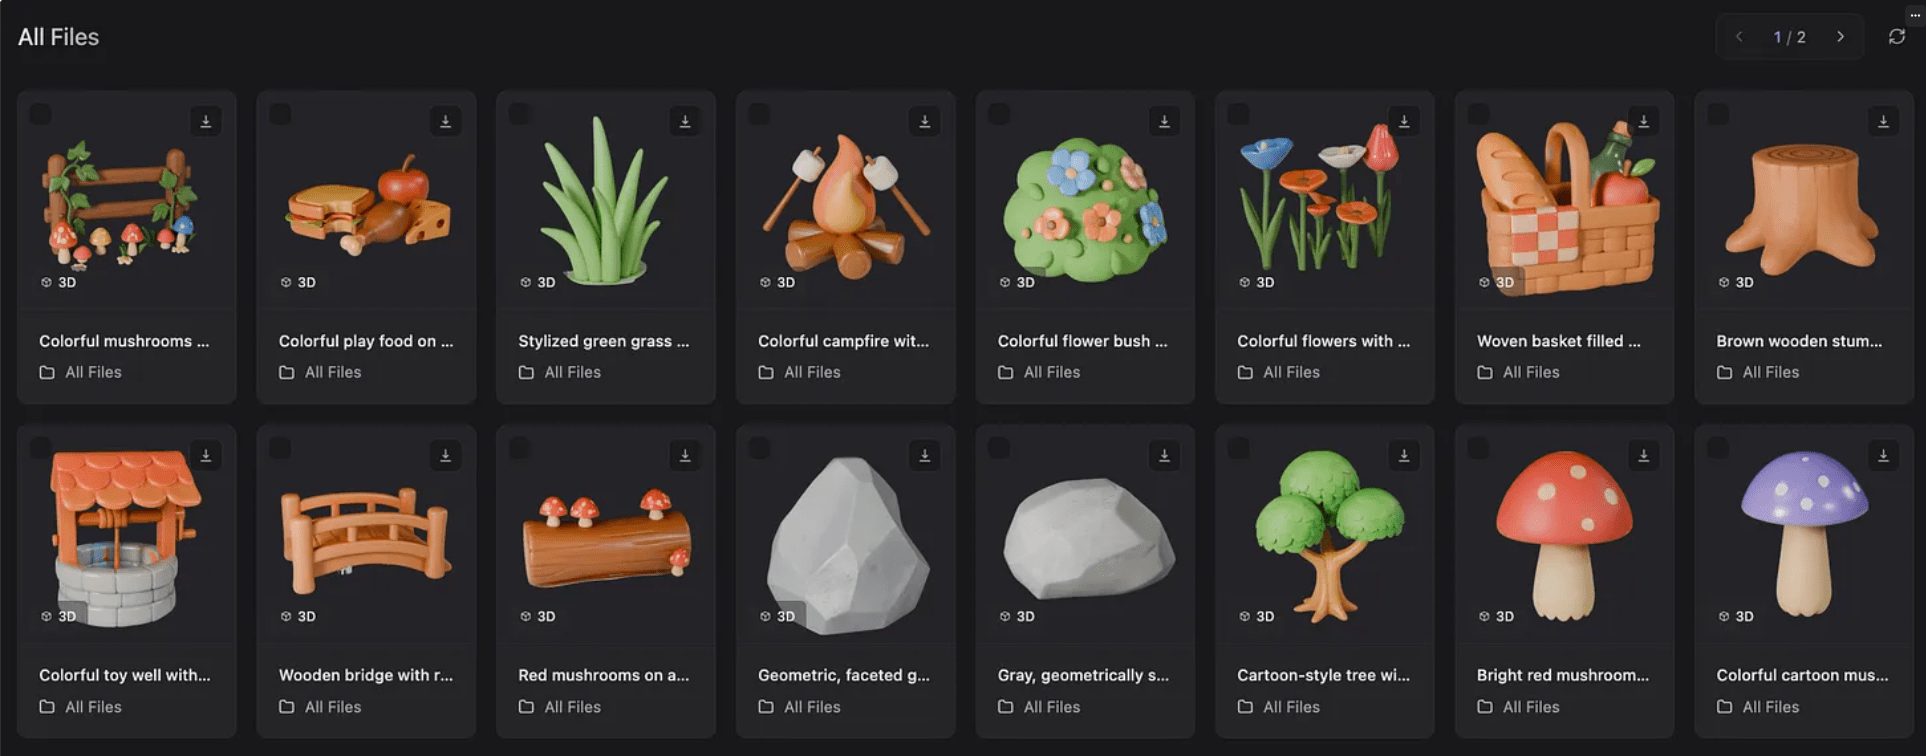
Generate more game assets based on your theme
You can use your game idea to help you come up with decorations to fill your environment with. The process is exactly the same as generating characters. Start with a 2D image, once you land on a style you like, use it as reference for all the others.
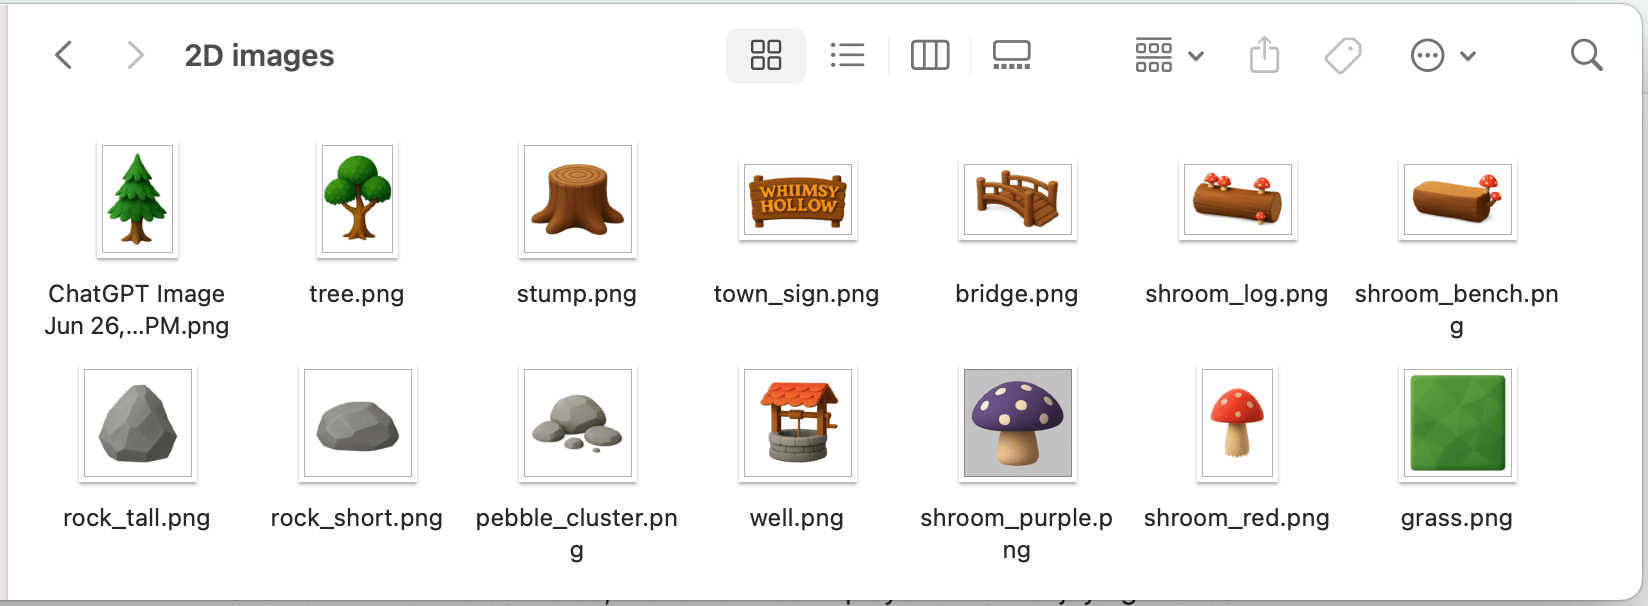
Just like the characters, the 2D reference images produced MAGICAL 3D models:
^ It isn’t very good at generating 3D models that have text on it though. Like signs (same goes for the 2D version in this case):

2.2. Setup your game dev environment
Download Unreal Launcher and Install Unreal Engine
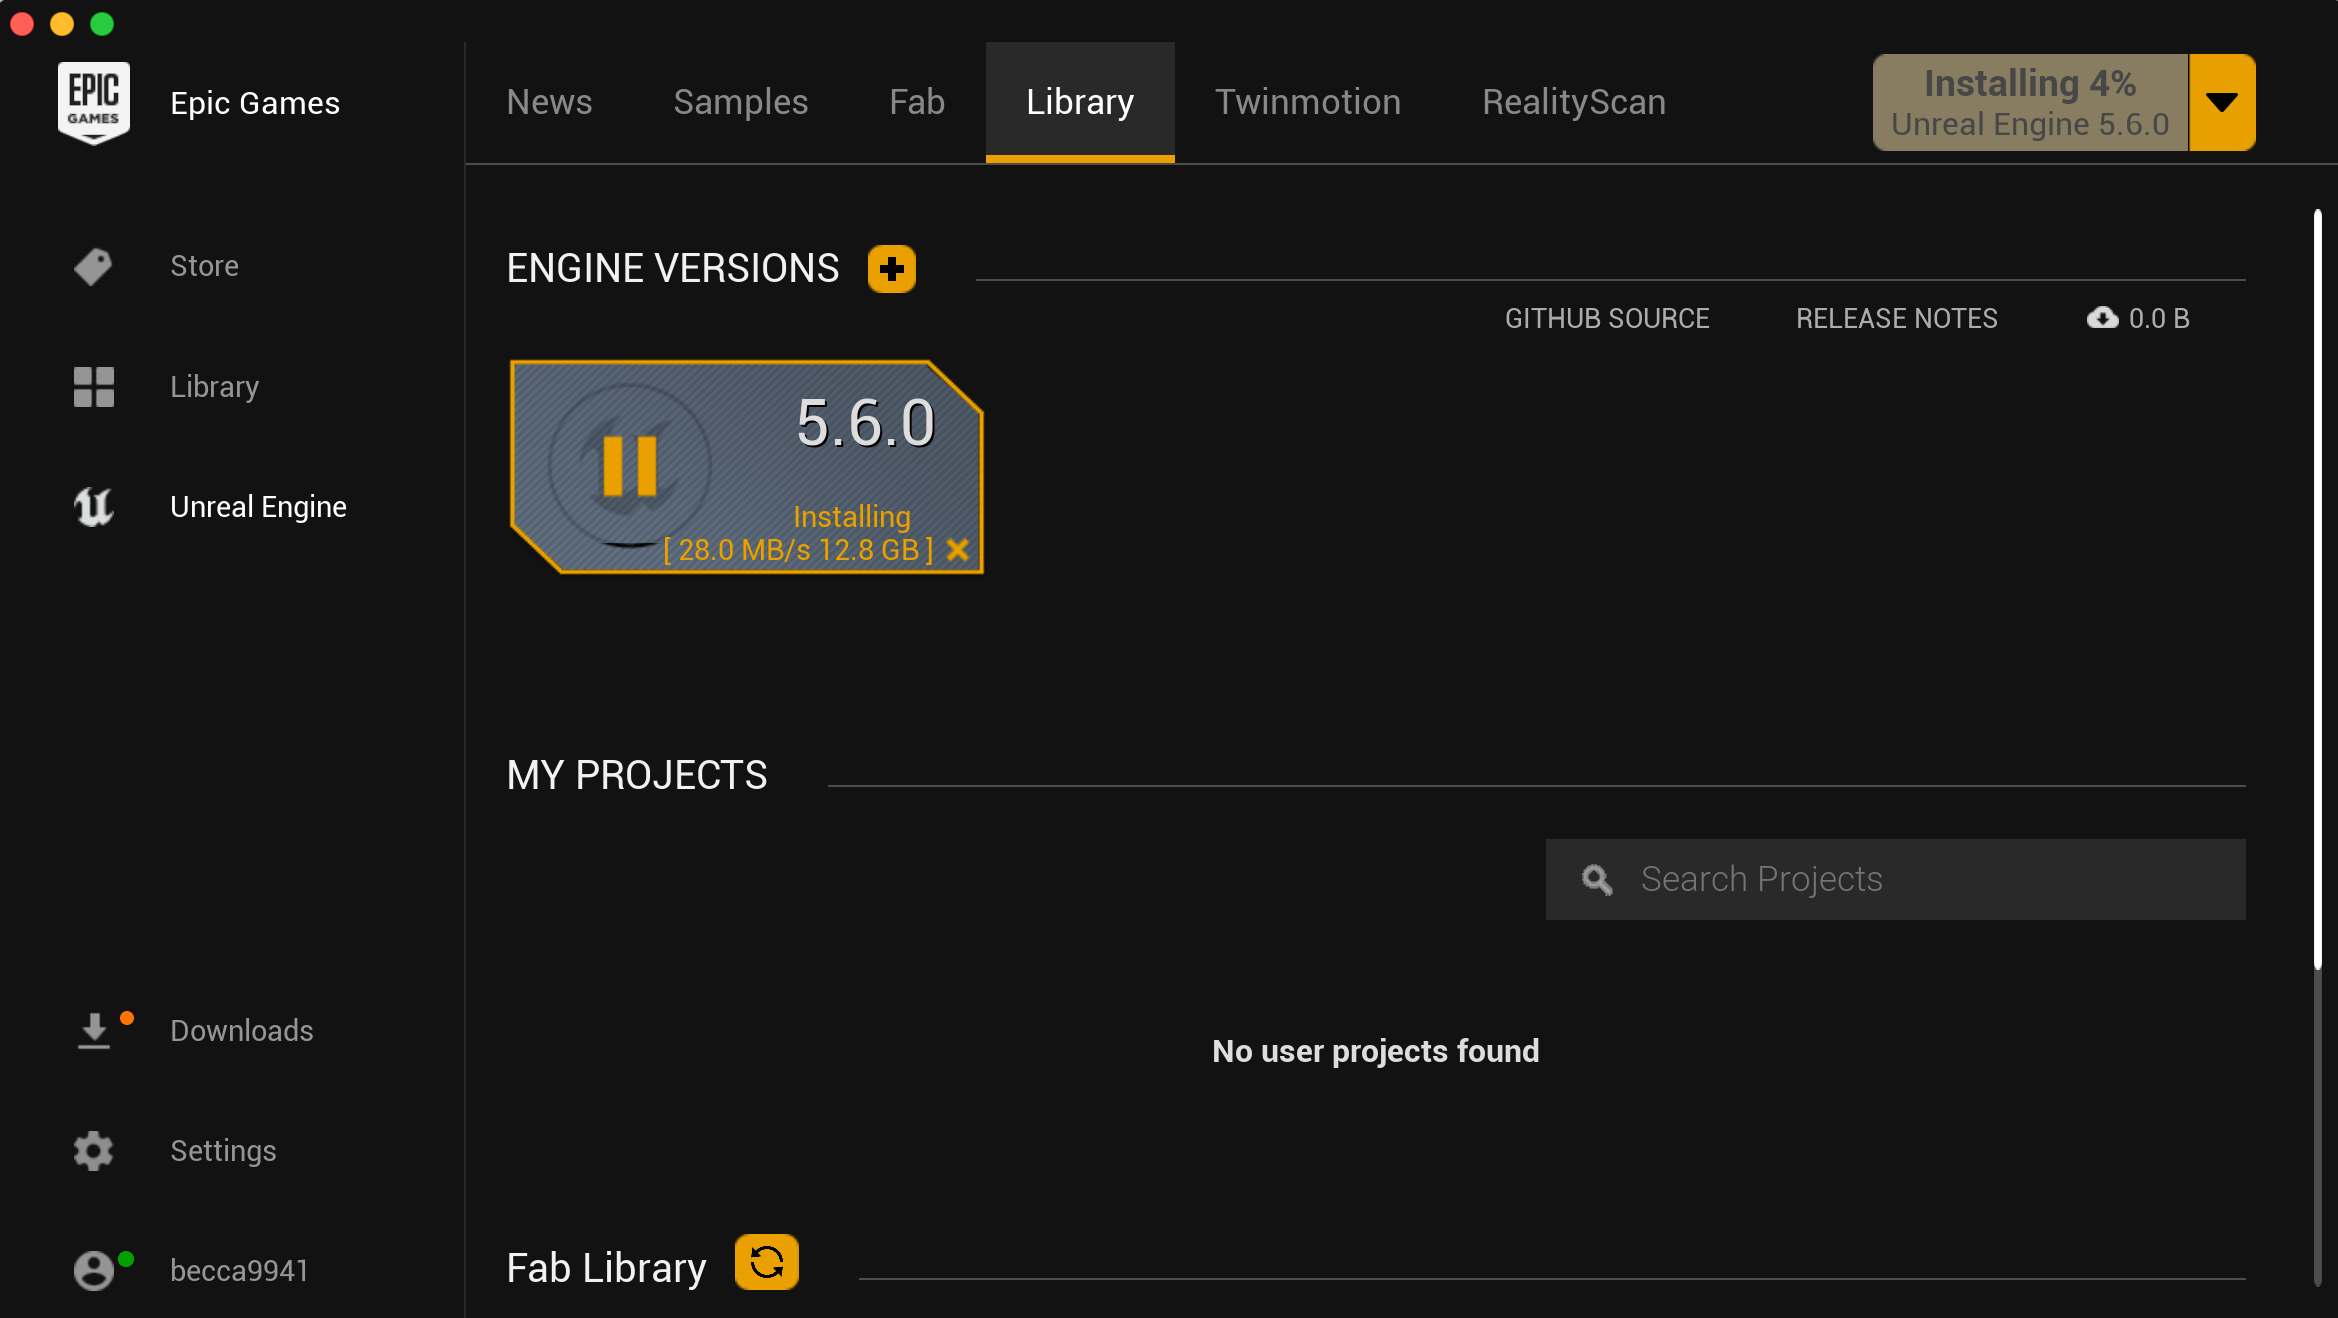
Go to Unreal and download Unreal Launcher, which will give you the Epic Games Launcher installer.
Once it’s downloaded, create a free account and sign-in. After you’ve done that, there will be a big button prompting you to install Unreal Engine, which is the engine you’ll use to build your world.
Install Xcode
You need Xcode to be able to use Unreal Engine. You can install it via apple’s app store if on mac.
You’ll need to open it and accept the license agreement before Unreal Engine will launch.
If Unreal still can’t find it, open your Terminal and type:
sudo xcode-select --switch /Applications/Xcode.app
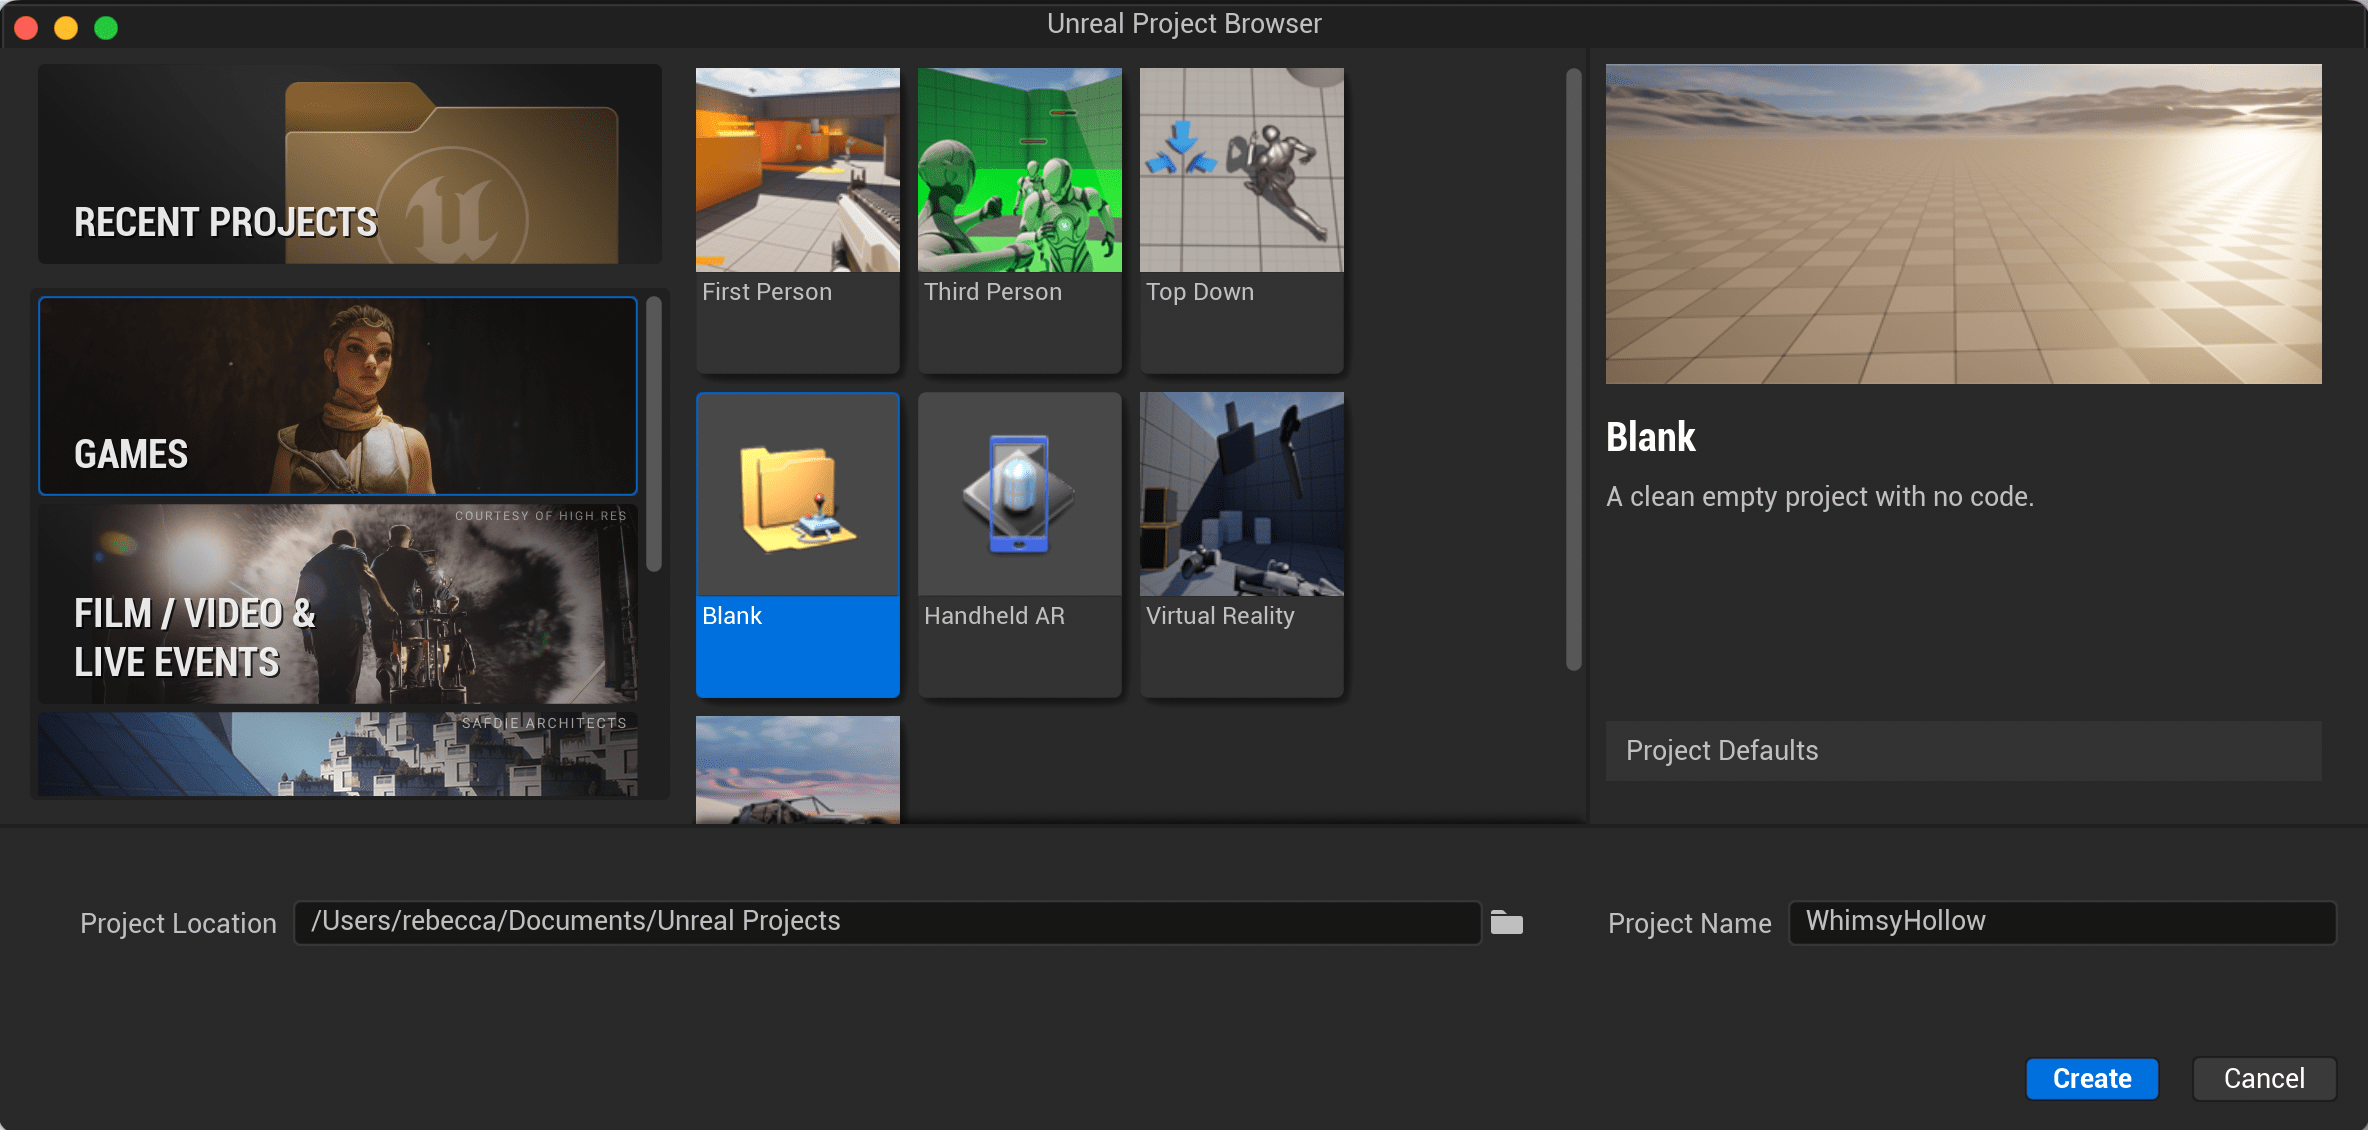
2.3. Create your first project
Download Unreal Launcher and Install Unreal Engine
For a game like this, select Blank and Blueprint. That will create a clean empty project with no code. The Blueprint option lets you build a game without needing to write a line of code, using Unreal’s visual flow-charting language.
I called my game “WhimsyHollow”.
Once you click “Create” and your project finishes loading, the first thing you’ll see is this:
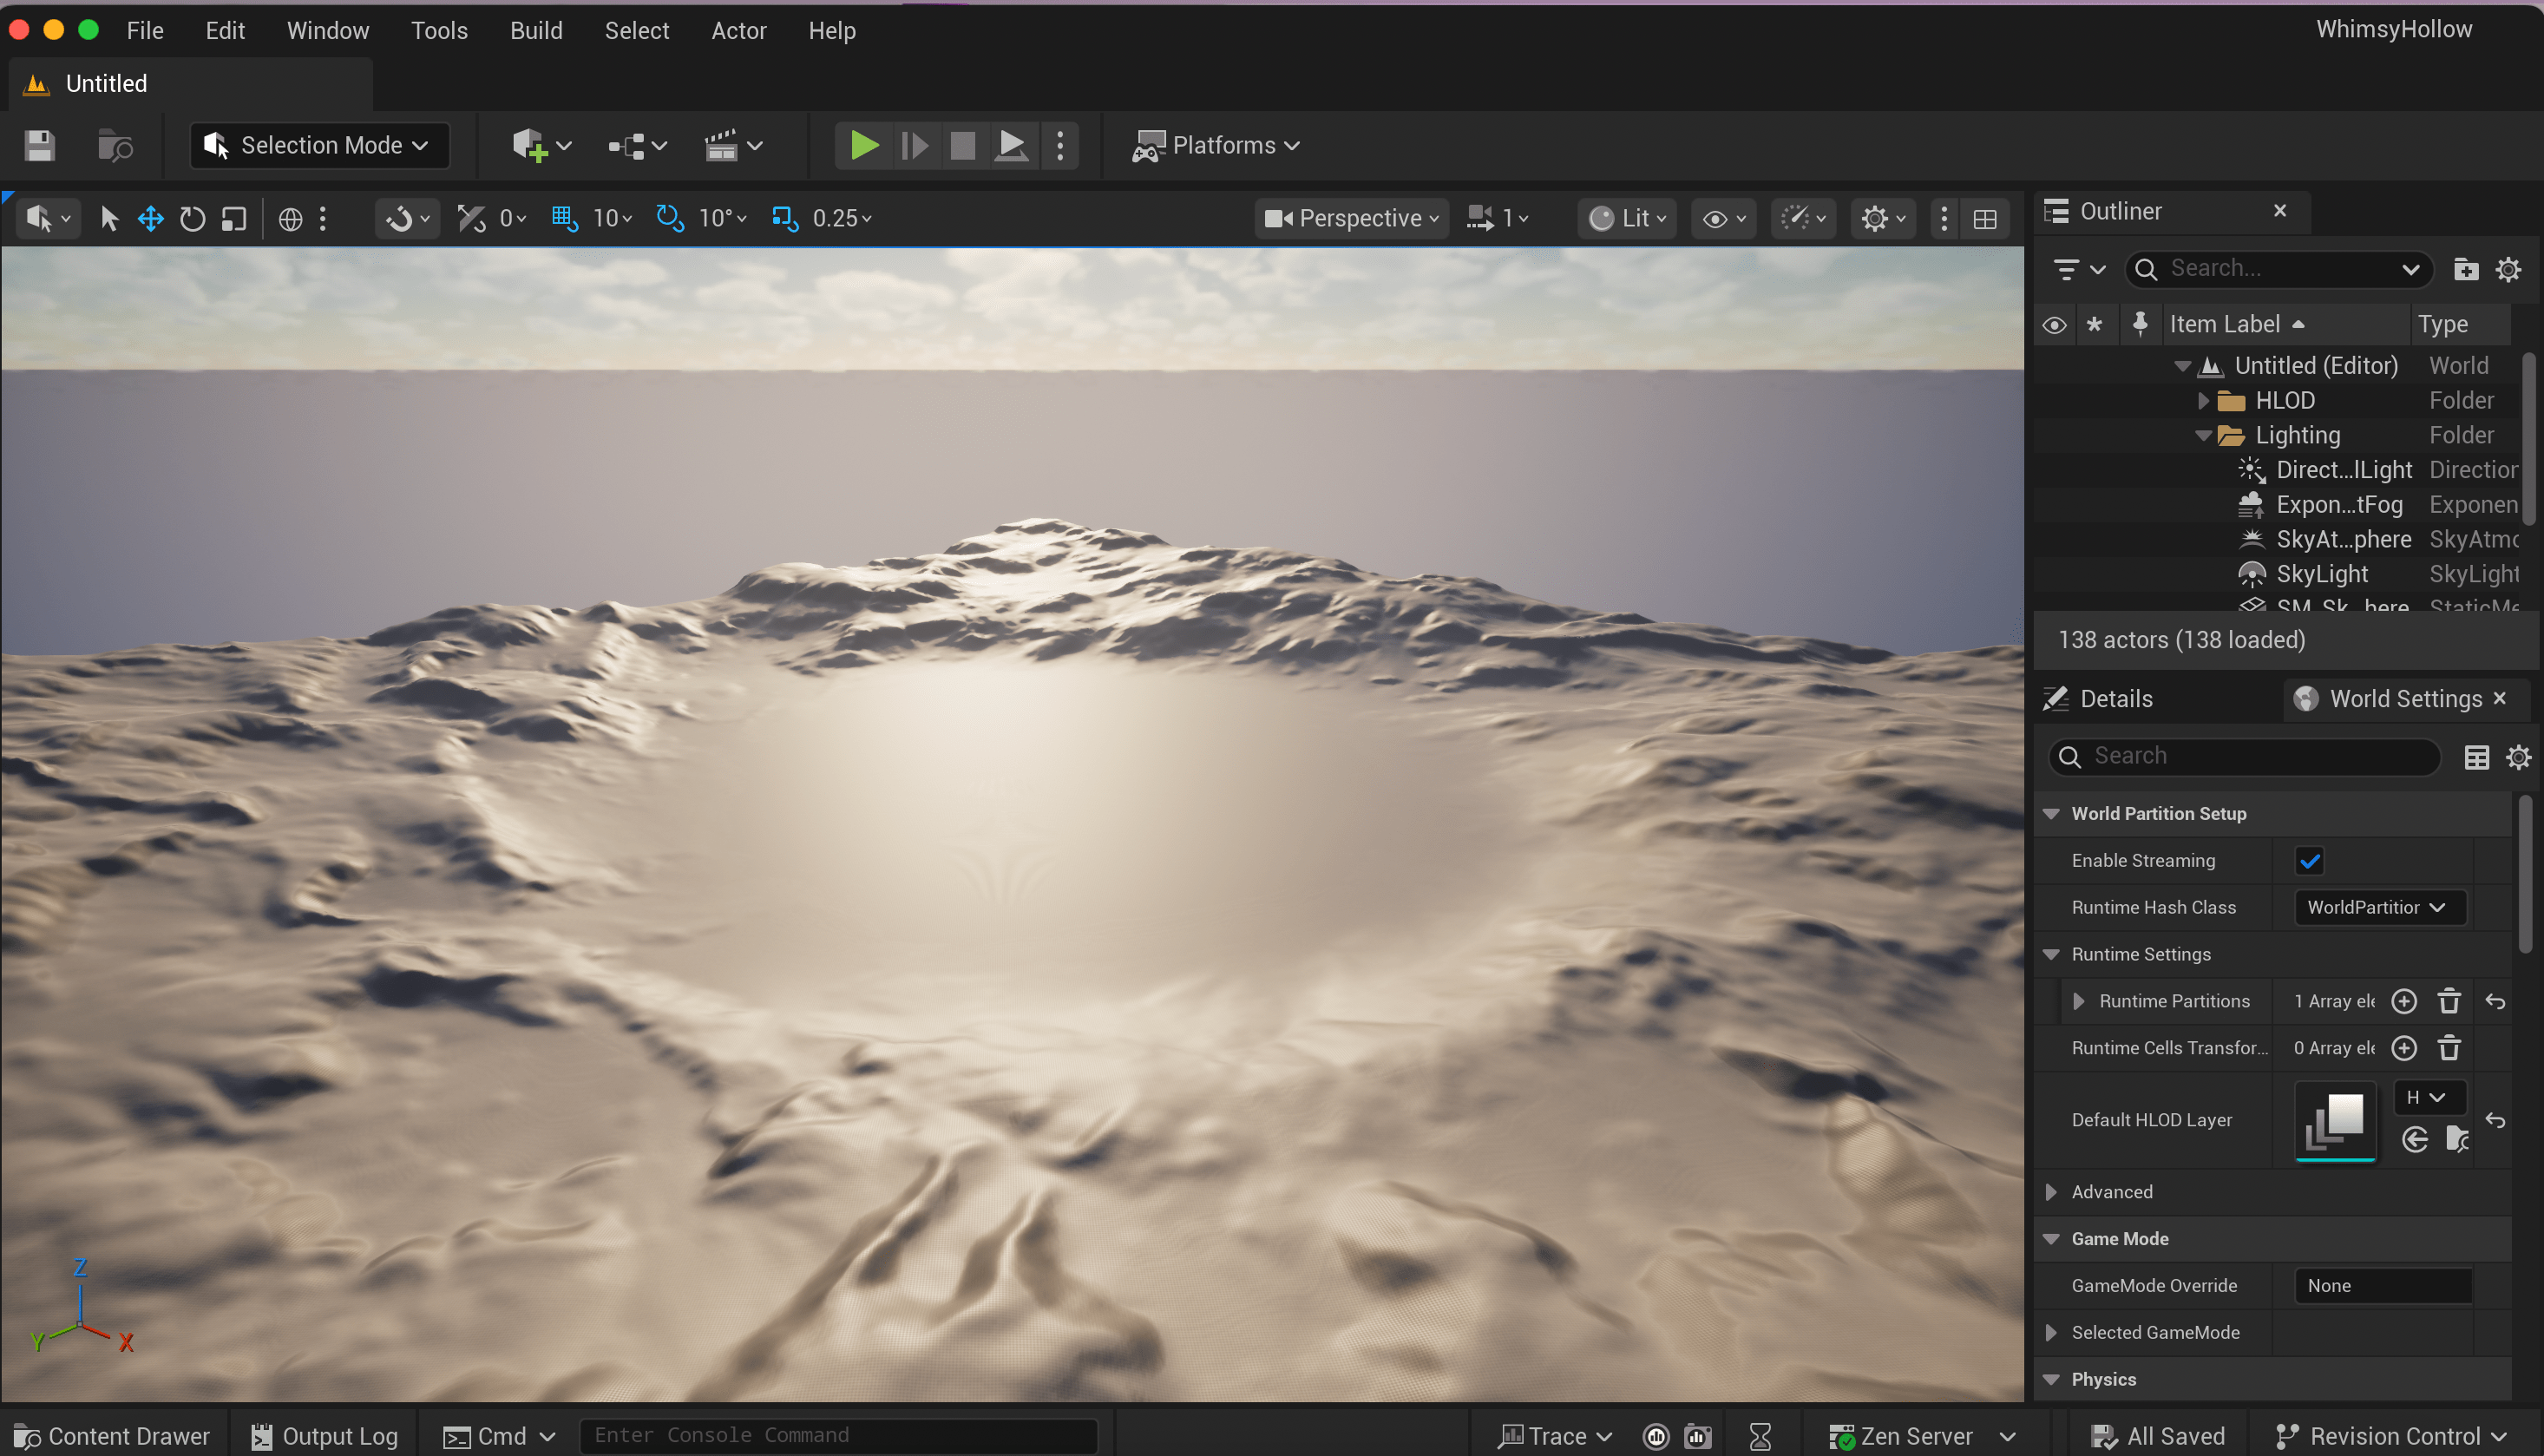
This is the open world that Unreal starts you off with. As I just want a simple forest scene, I decided to create a simpler level to start with.
Click “File” > “New Level” > “Basic” > “Create”.
This will create a simpler level with a floor, sky, camera, and lighting.
2.4. Get your character to walk around
Now we have a blank level, we can import our first main character.
Import your character
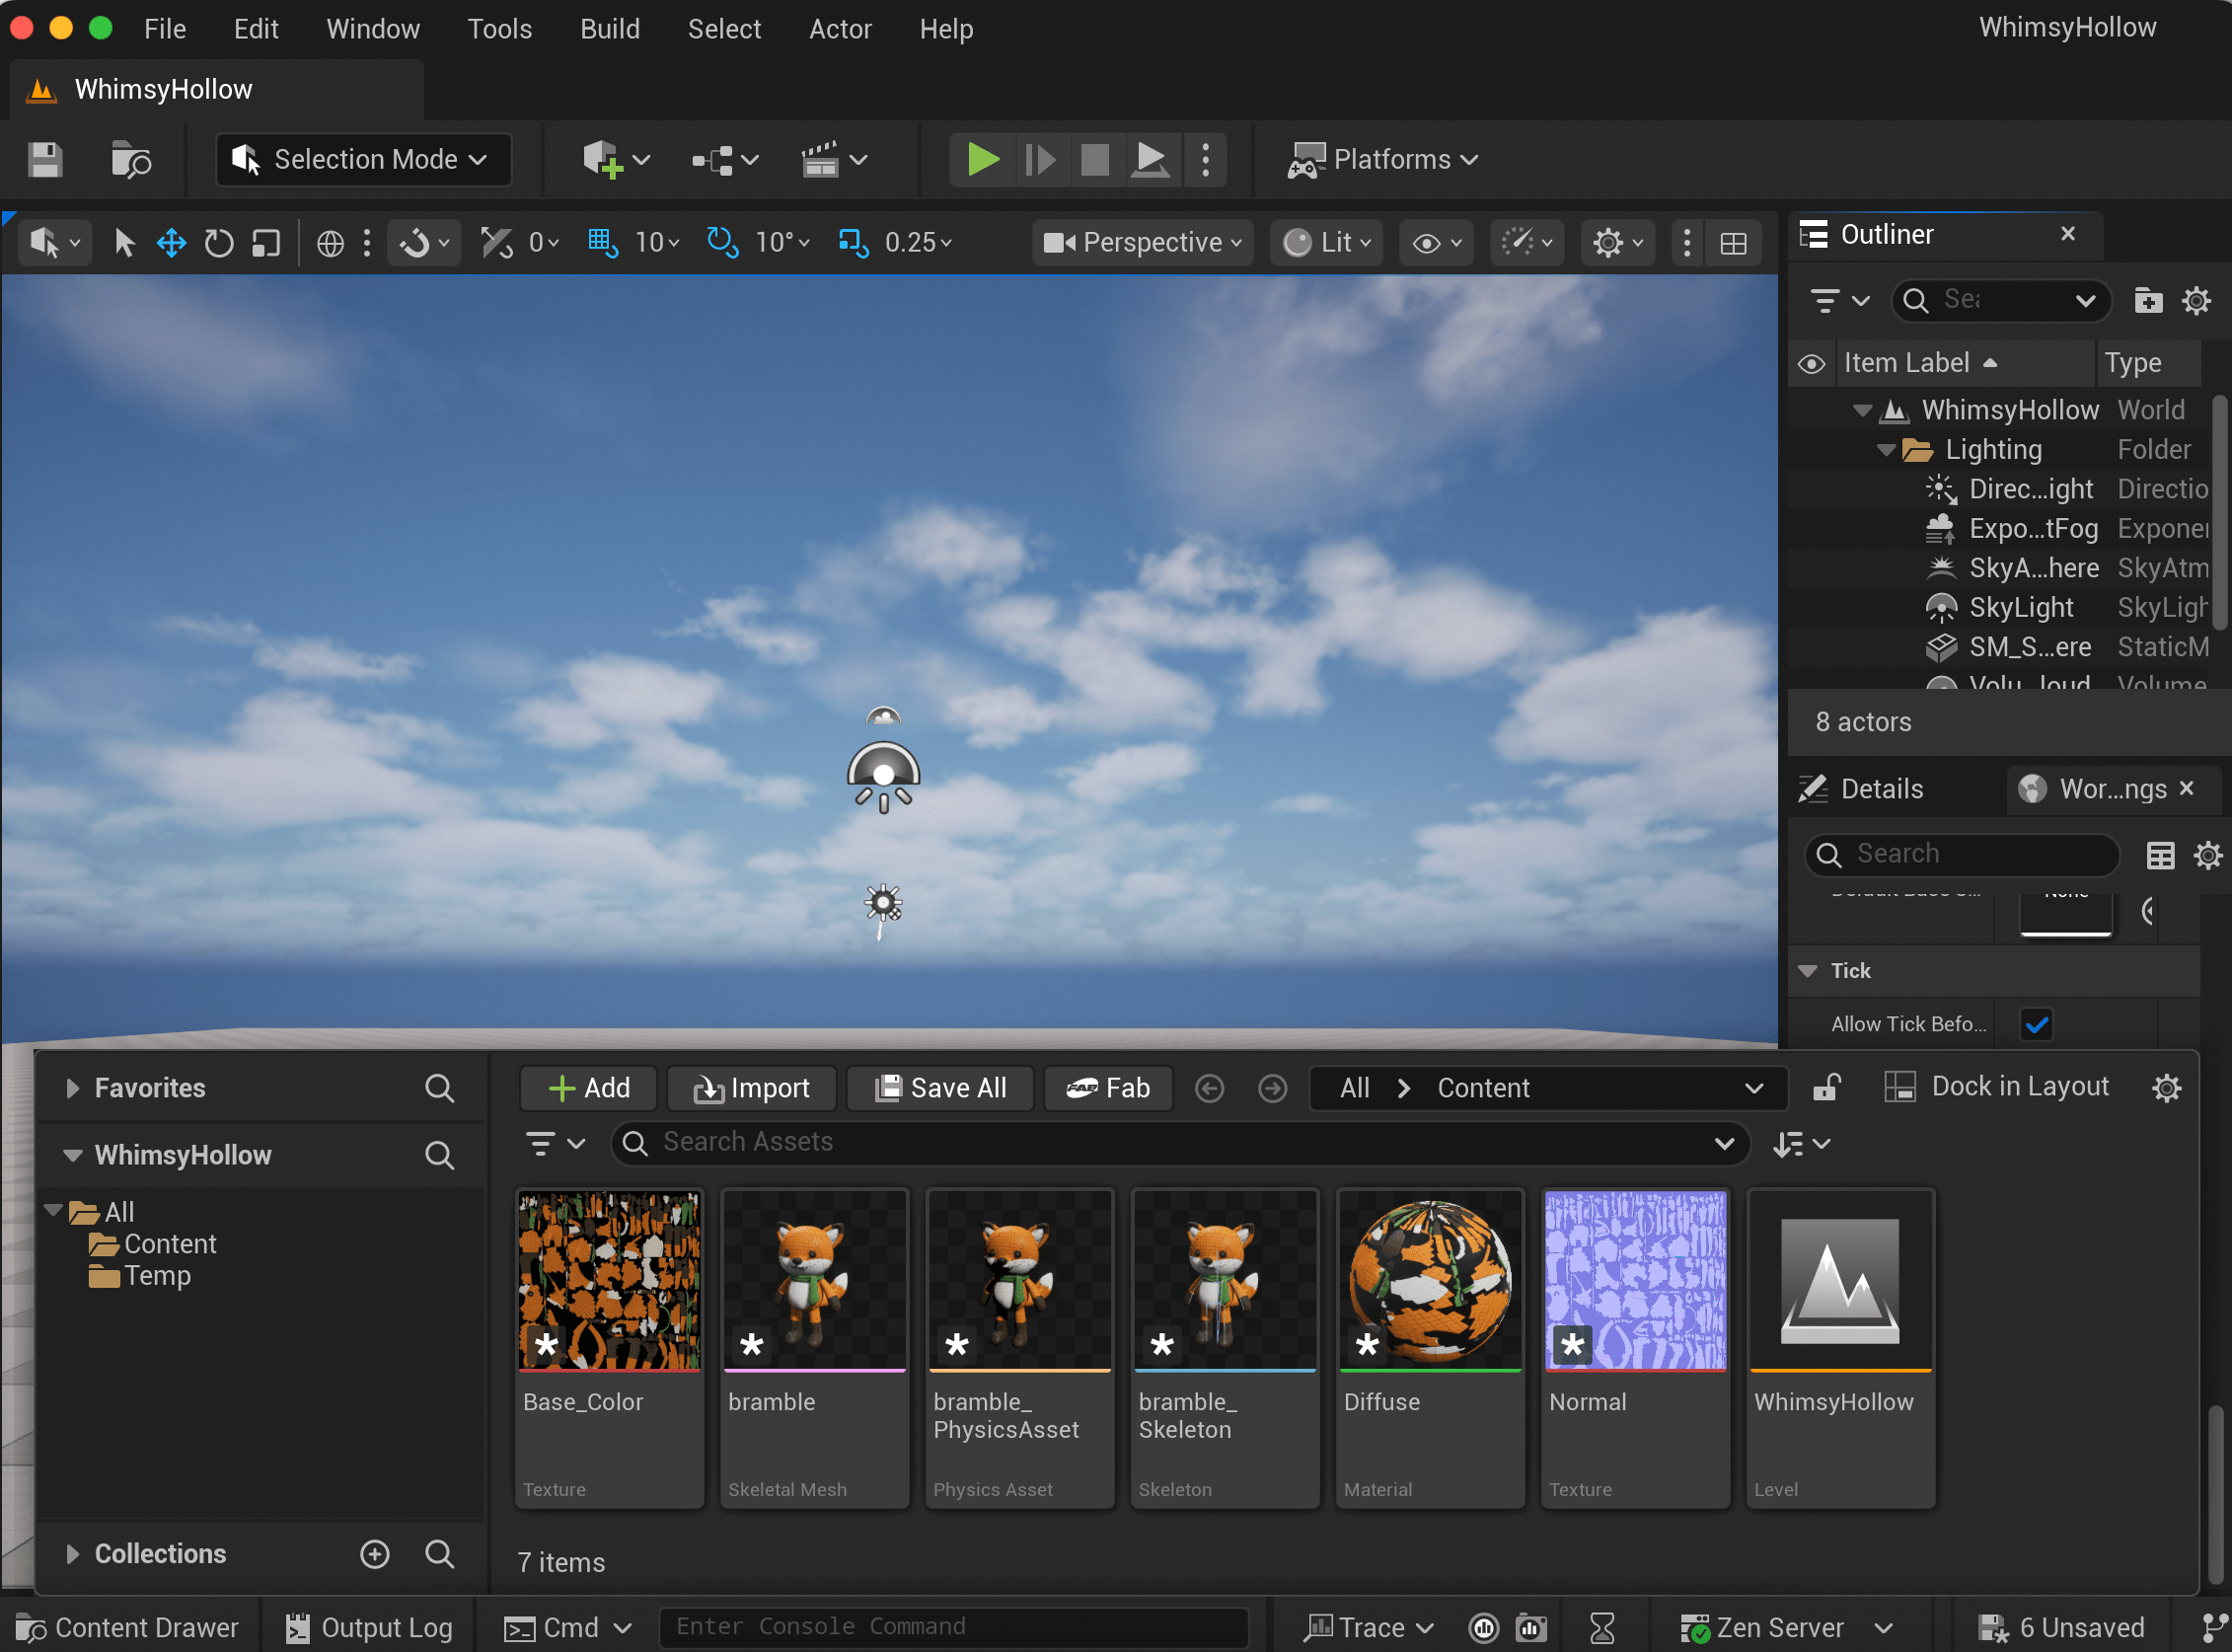
Click on “Content Drawer” at the bottom of the screen.
Click the “import” button.
Navigate to the “.fbx” file for the fox that has your skeleton attached to it, select it and click “import”. Your content drawer will look something like this:
Make your character stand idle and walk
Making your character stand idle and walk is the hardest part of developing your first game. There are very few great tutorials on the subject, and many reference older versions of Unreal Engine where core features were completely depreciated.
I have linked out to two YouTube videos, that cover exactly what you need to do to get your characters walking around. Take your time to follow the steps in them exactly. It’ll save you a huge amount of time trying to figure it out.
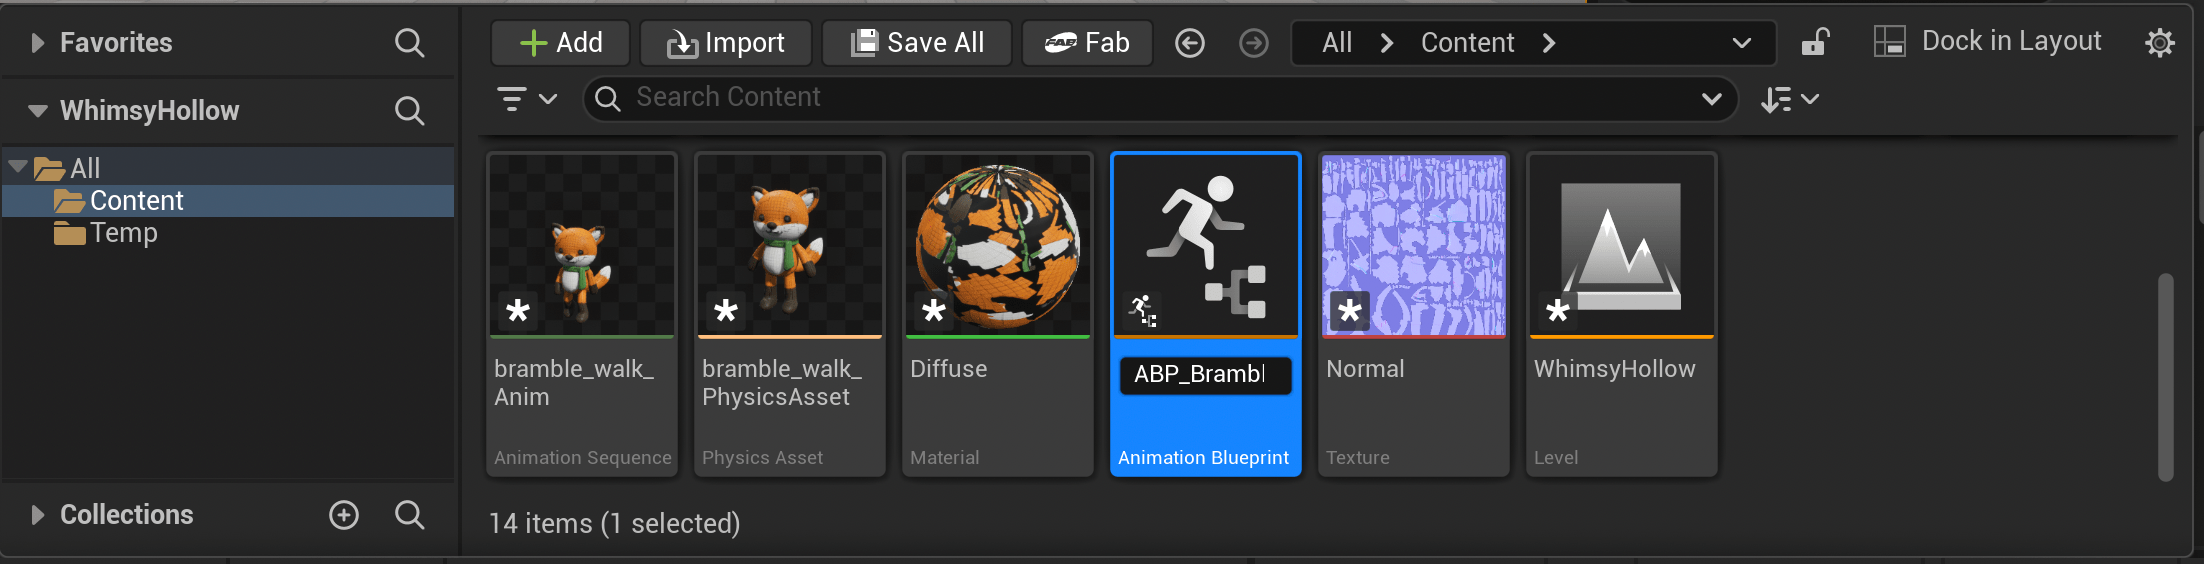
Open the content drawer.
Click “Add” > “Animation Blueprint”.
Click on your character’s skeleton then “Create”.
Call it something like “ABP_Bramble” (or your own character’s name), then double-click on it to open up the animator file.
Then follow every single step in this YouTube video by Ryan Layley. A text-based tutorial for this part will make your head implode and there isn’t enough room in this post for it all. It’s an exceptionally clear and beginner friendly video (I watched many before getting lucky with this one).
At the very end of this video, it tells you to connect your character to your character blueprint. You’ll learn how to create the character blueprint in the next section so come back to that after you’ve set it up.
Create a character blueprint
Go to your character folder, right-click and click “Blueprint Class” > Then “Character”.
Call it “BP_YourCharacterName”. I called mine “BP_Bramble”, then double-click it to open it.
Under the “Mesh” dropdown in the details tab on the right, select your character from the dropdown next to “Skeletal Mesh Asset”.
Resize your character until it fits inside the little capsule, and rotate it so it’s facing the same direction as the arrow. The capsule isn’t clear in this screenshot because it’s the same orange colour as my fox. The YouTube video in step 6 will show you properly.
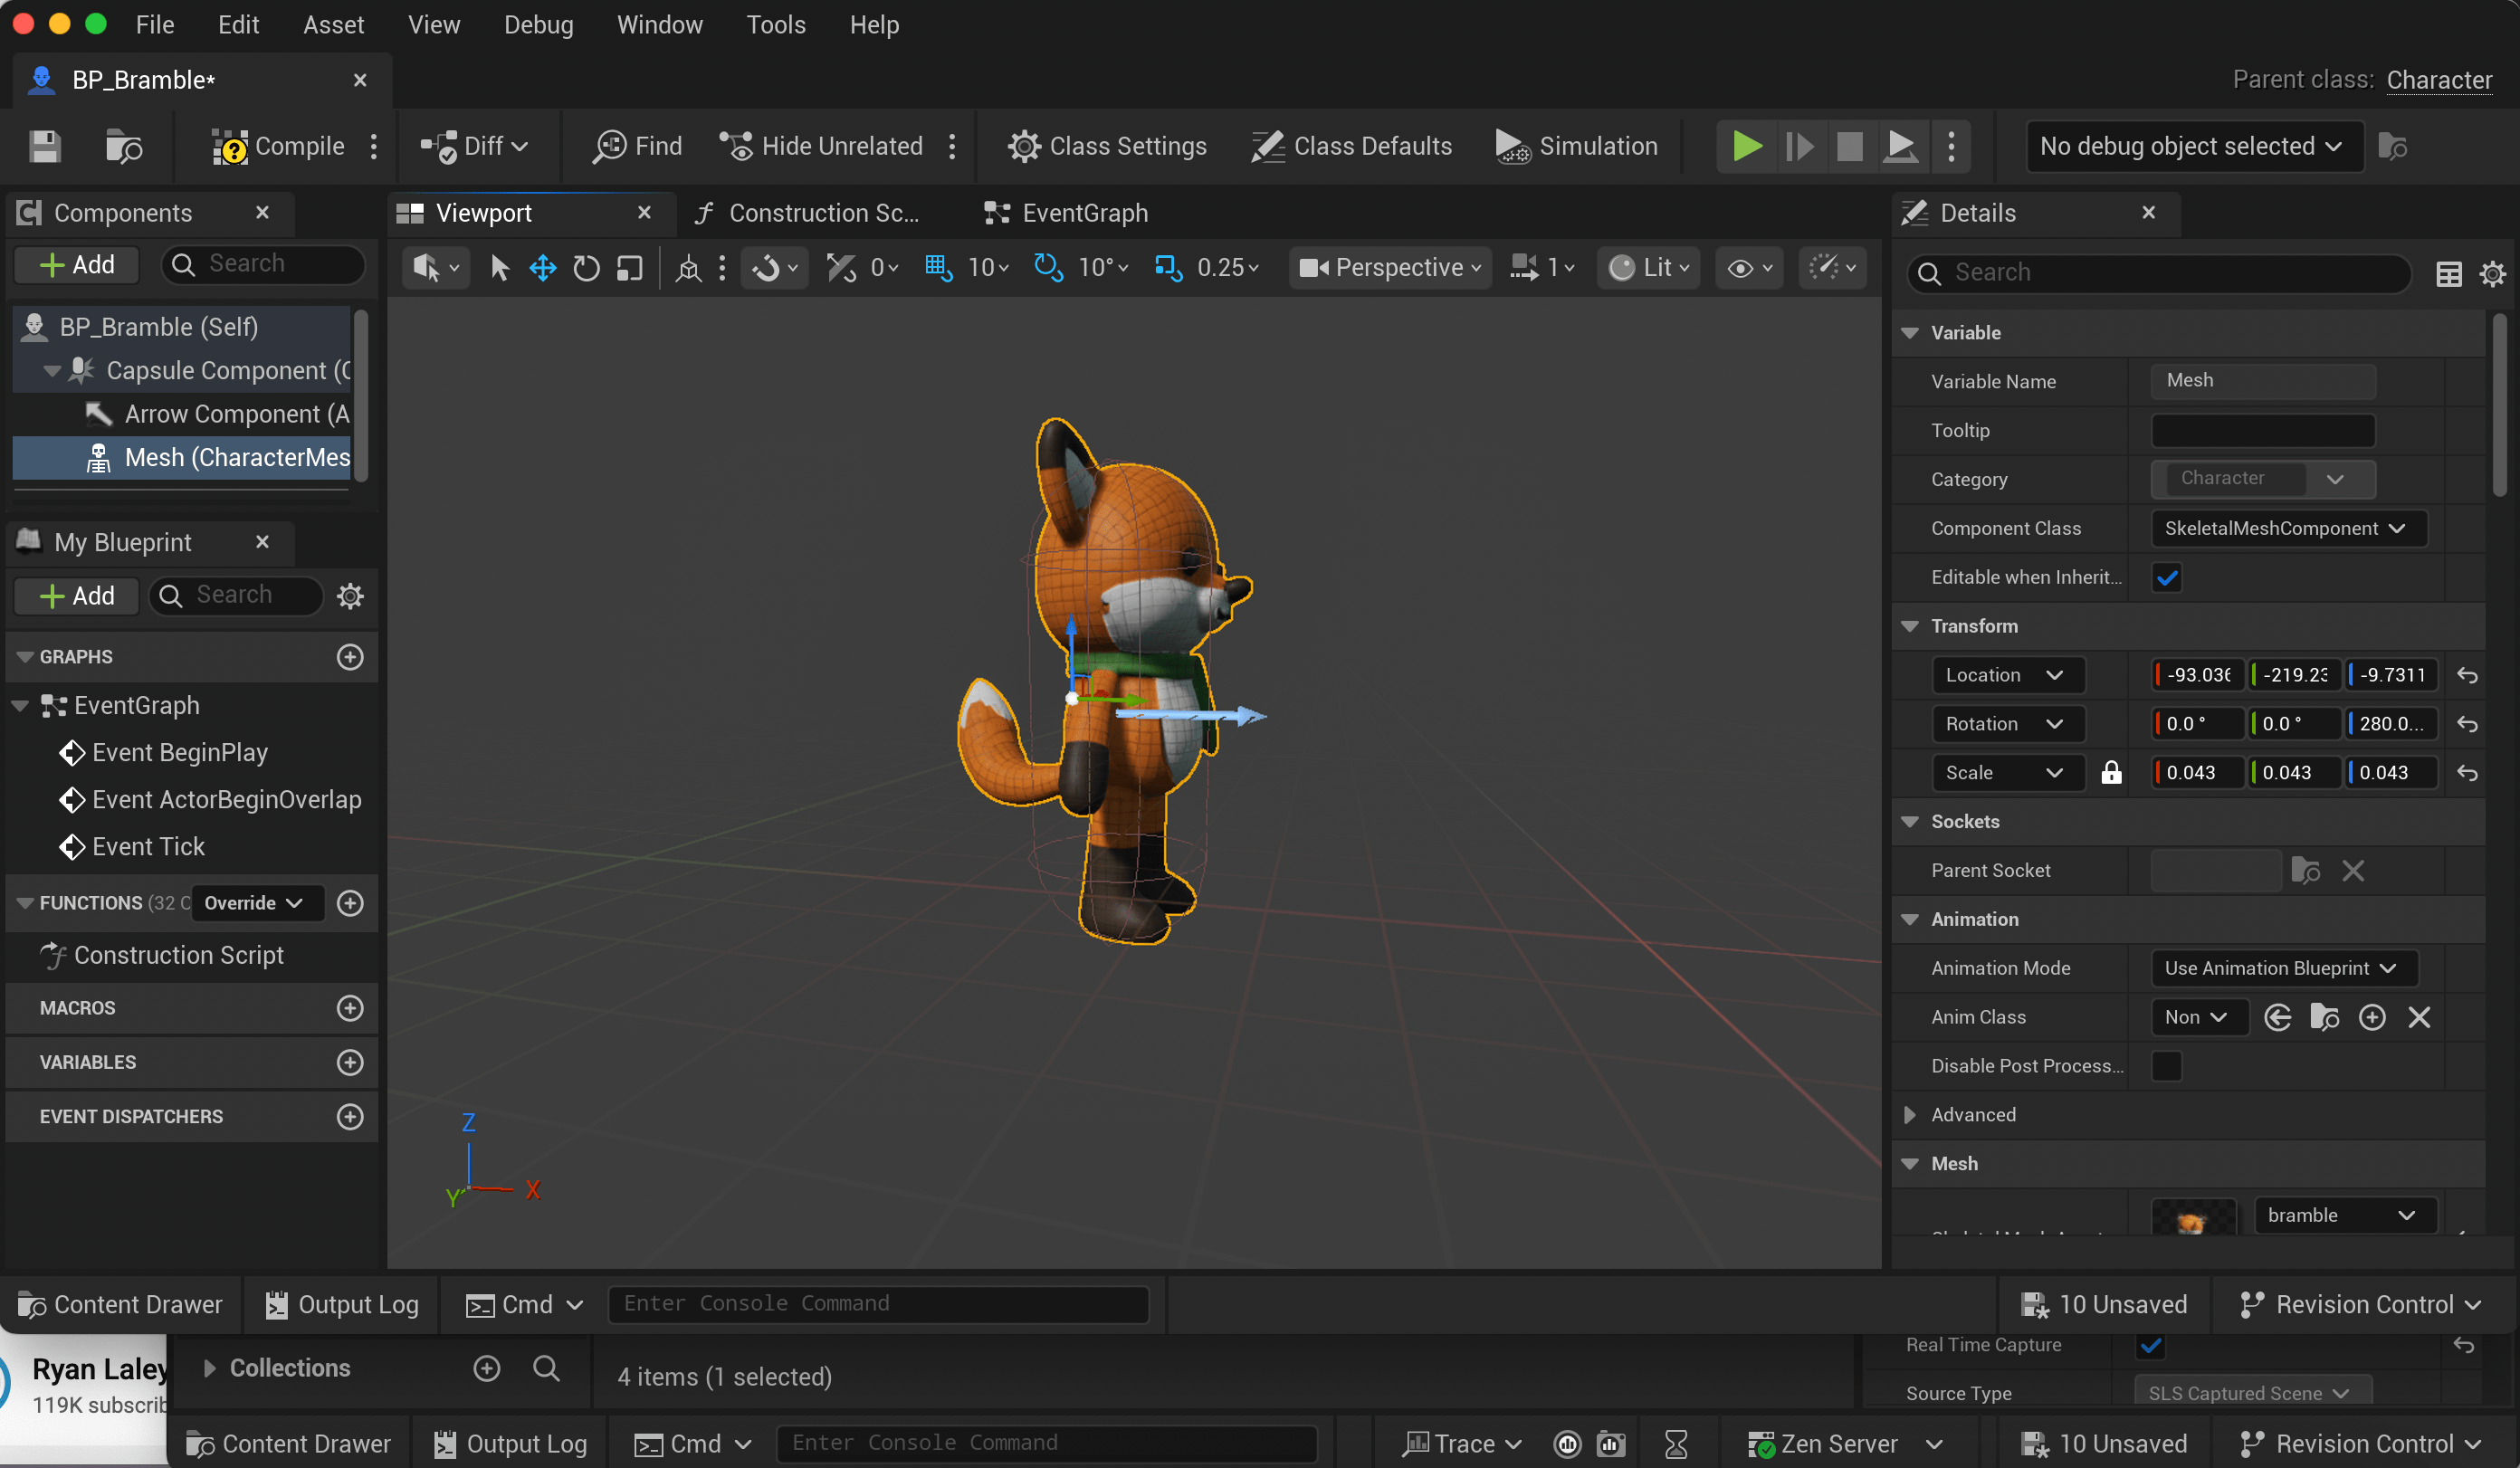
Then in the Animation tab, set the Anim Class to your your character animation blueprint.
Next, follow this YouTube video by Matt Aspland, which will teach you how to:
Create input mappings, to connect your keyboard keys, mouse or joystick etc to movement changes).
Create a Character Blueprint which will describe the logic for how your character should move. It includes walking, jumping, and attaching a camera to your character so it follows it as it moves around.
Spawn your character so that it starts in the same place every time you click play to start your level (I fell off the edge of my flat world, and this let me spawn back in the middle of the safe place).
At this point, you should have gotten a huge amount of dopamine from getting your character to walk around your world. EEEEEEEP!
After you’ve got your character walking, it’s pretty straightforward to add and place all of your 3D generated decorations, because you don’t need to do all the movement mapping.
How awesome is this!?!?!? I’m so excited to see what games and 3D experiences people create now that 3D modelling and character / item design isn’t a barrier to entry. You can even generate music tracks for your levels using Suno. my prompt for the track in the demo video at the top of the post was:
Retro rpg chiptune game music electronic whimsical
I also wrote a guide for getting your characters to wander around in a world build with Unity, as well as a deep dive into generating cursed 3D models with Meshy. There wasn’t room in this newsletter to include them, but you can find them at the bottom of this page:
Extended edition (Unity guide + failed Meshy experiments).
If you build your own game using this guide. PLEASE tell me all about it, I LOVE it when you do.
Until next time,
Stay sparkly 💖
If you’d like to see more frequent updates, connect with me on LinkedIn 🥰
Moar GenAI Projects! 🤖🧪✨
🎁 Here are some more projects to check out if you loved this one!

